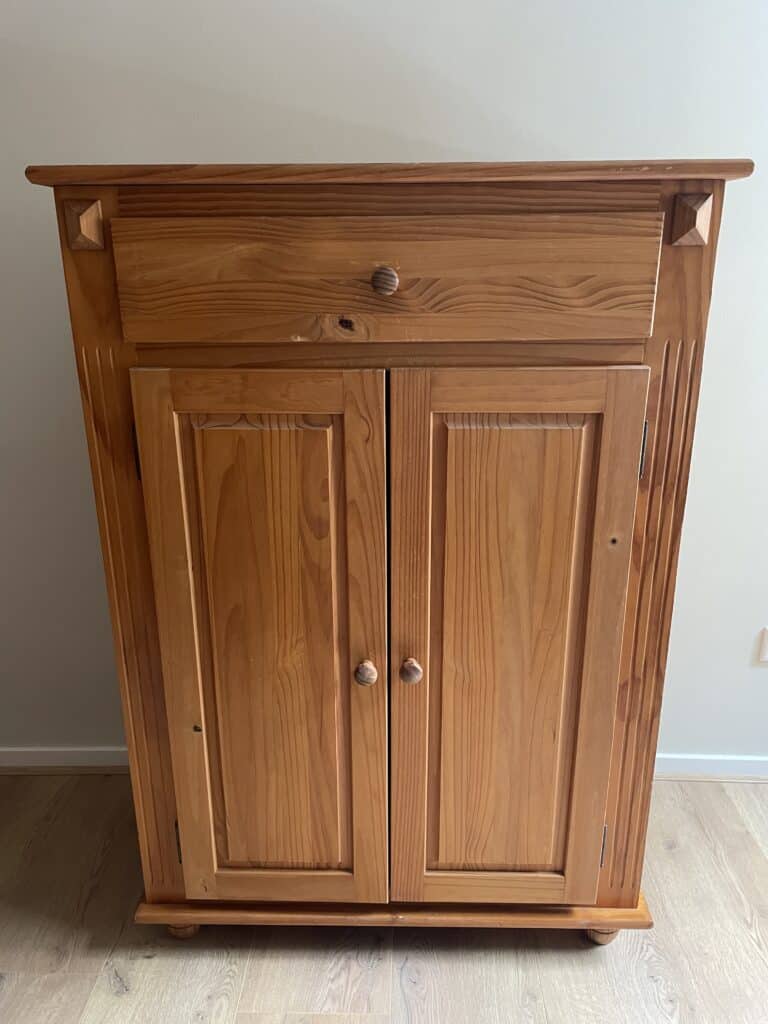
Welcome to my latest DIY storage cabinet project, breathing new life into a Marketplace find. This time I found a sturdy “girl’s wardrobe” for only €75. But this cabinet was crying out for an upgrade….
In this blog, I will take you step by step through the entire process of this makeover. A handy list of all the supplies awaits at the bottom of the blog so you can upgrade a similar cabinet yourself! Quickly discover how to refurbish a Marketplace cabinet yourself and create a unique sustainable eye-catcher!
The preparation: disassembly, degreasing and filling
The first step is to remove all fasteners, freeing the doors for further processing. Next, you are going to thoroughly degrease the decades-old cabinet. Degreasing is important to prevent embedded grease and dirt from sanding into the wood during sanding.
In my case, I then filled the holes of the old door handles, since my new handles had a different center distance. You can fill these holes with Albastine wood filler and let it dry for at least 3 hours.
Sanding and priming: the second stage
After this, I began the next phase: thoroughly sanding the entire cabinet. Because of the large areas, I used a sander. It is important to completely remove the old coat of paint so that the primer to be applied later can adhere optimally.
After thorough sanding, it is time to degrease again. This prevents any dust from sanding from getting into the fresh primer. Next, apply a lacquer primer to ensure that the lacquer paint can later cover properly and evenly. Choose a similar shade of primer to the final lacquer paint. These careful steps lay the foundation for a unique DIY storage cabinet!
Color selection: Burgundy Wine, the color of luxury
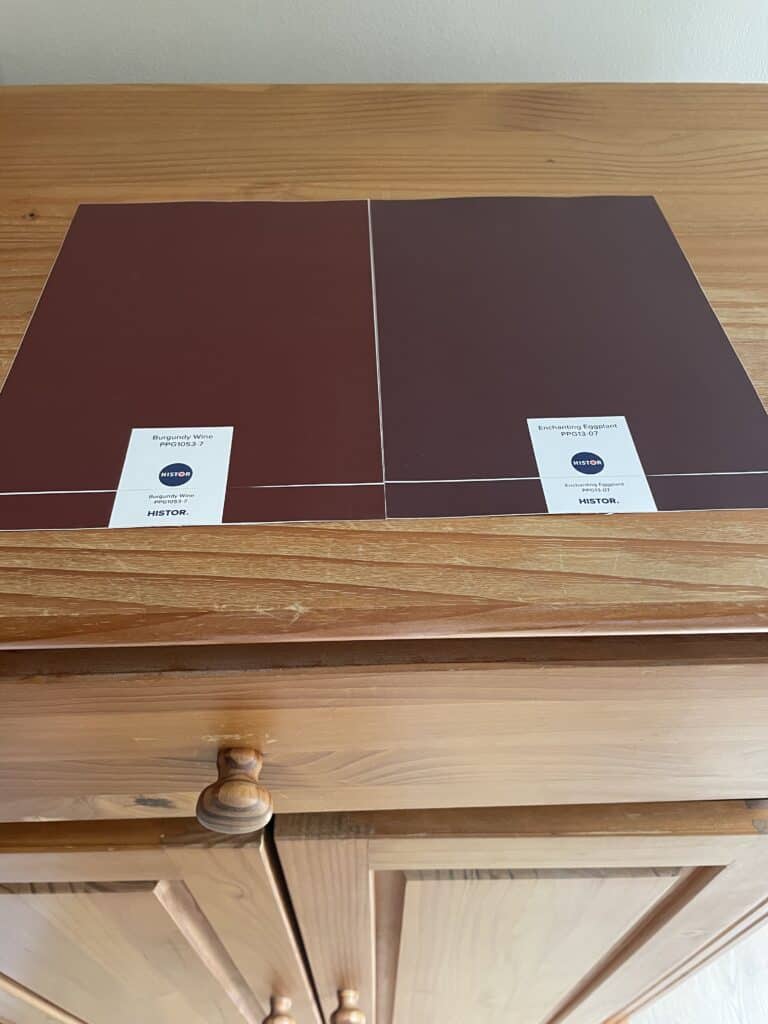
To determine the right color, I purchased two Histor Color Samples at the hardware store, namely in the shades Burgundy Wine and Enchanting Eggplant. These samples are available in A5 format, allowing you to judge at home in the exact spot where the cabinet will be placed which color will look best, taking into account the light.
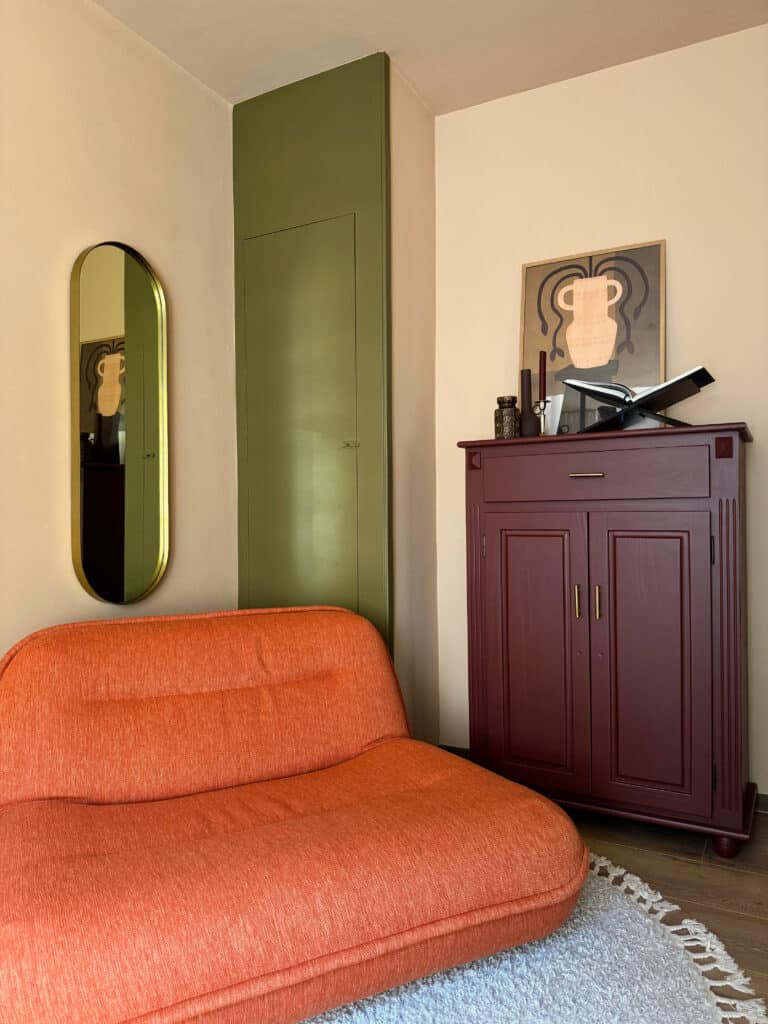
In our case, the cabinet is in a slightly darker corner, and the color Burgundy Wine turned out beautifully. This hue gives the cabinet a powerful and luxurious look, making it the perfect choice for a stylish girl’s closet. Choosing color carefully is essential to creating the desired atmosphere. Color also highlights the unique characteristics of the piece of furniture.
Painting: two coats for the perfect result for your DIY storage cabinet
I applied two coats of paint in the color Burgundy Wine. It is important to leave enough time between coats to allow the paint to dry properly. I applied the first coat in the late afternoon and the second coat the next morning.
Note: Despite using primer, I often find that with darker paint colors, two coats are really necessary for the best results. After trying different paint brands, this seems to be a common occurrence with all brands. So keep this in mind during your painting project!
Optimal storage: a homemade shelf for your stuff
The original cabinet had only one shelf, which meant you could only use the bottom layer and shelf for storage. To increase functionality, I moved the existing shelf and added an additional shelf. This created significantly more storage space.
At Praxis, I had a board cut to size for free, which is handy if you want to save time or don’t have a suitable saw yourself. Thanks to these modifications, the cabinet now has three layers, making it a perfect storage solution for all of our stuff!
Stylish finish: golden brass handles for the perfect touch
The old handles have been replaced with refined gold brass ones by Yessential, called “Remo Gold. These handles are available in a variety of colors and sizes, making them suitable for use for a closet, for example. These subtle yet striking details add a touch of luxury to the case and match perfectly with the beautiful Burgundy Wine color.
The end result: a unique DIY storage cabinet
After many hours of tinkering, I couldn’t wait for the final coat of paint to dry. I sent a picture of the end result to the previous owners, and suddenly they regretted their sale haha. This particular DIY storage cabinet now shows off in my study, where I use it to store my color and material swatches in an organized way.
Have you been inspired by the DIY storage cabinet and want to get started yourself? Be sure to take a look on my Instagram, where I show step by step in a Reel how I upgrade this closet. Still have questions? If so, feel free to send me a message!